
A Halloween Decoration You Can Make in an Afternoon
Not every Halloween decoration needs to flash, scream or leap towards unsuspecting visitors.
Sometimes a collection of simple handmade pumpkins is all you need to bring a room into the season.
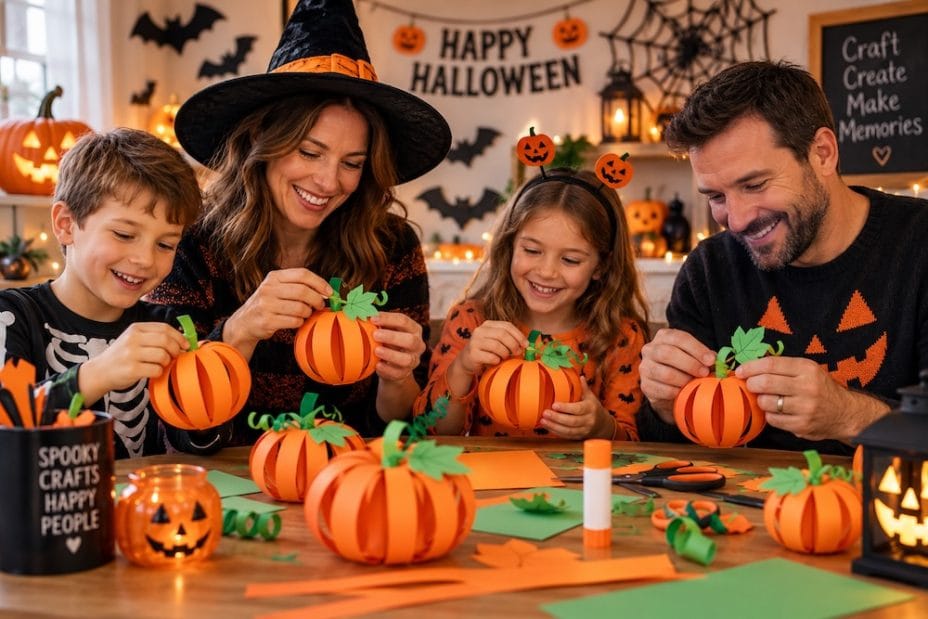
Paper pumpkins are particularly useful because they’re inexpensive, adaptable and remarkably easy to make. No pumpkin pulp to clean up, no carving equipment, and no race against time before your creation starts looking less attractive than when you made it.
Make them small enough for table decorations or large enough to fill a window display. Use traditional orange paper or abandon tradition completely and create black, white, gold, patterned or even newspaper pumpkins.
The basic technique is simple enough for children, while more elaborate versions provide plenty of scope for adults who enjoy seasonal crafting.
What You’ll Need
For a basic 3D pumpkin, gather:
Orange craft paper or cardstock, green paper for the leaves and stem, scissors, a ruler, pencil and glue or strong double-sided tape.
Medium-weight cardstock generally produces a pumpkin that holds its shape better than very thin paper.
Optional decorations include ribbon, glitter, patterned paper, metallic pens, stickers and artificial leaves.
Step 1: Cut Your Paper Strips
Cut several strips approximately 2.5 cm wide and 15 cm long.
These measurements don’t need to be exact. Longer strips create larger pumpkins, while shorter ones produce miniature versions.
The key is keeping the strips about the same length.
Six to eight strips will produce a relatively open pumpkin. Ten or twelve create a fuller shape.
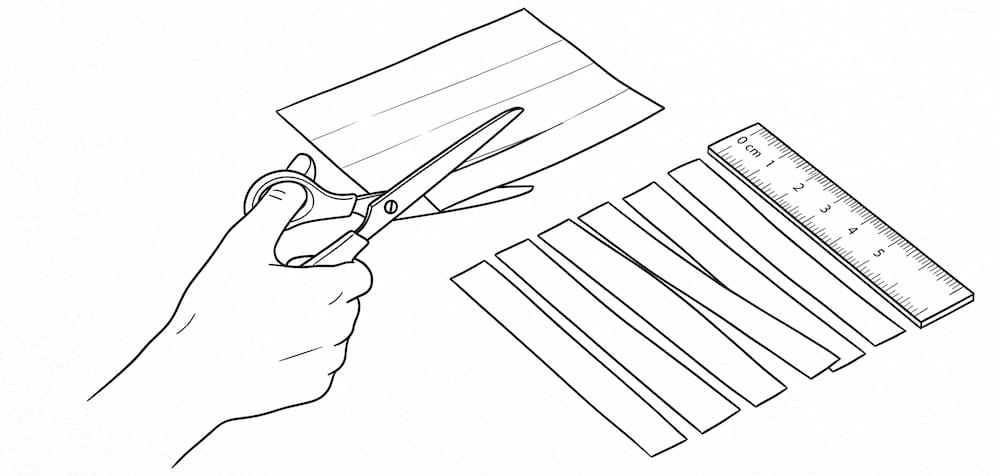
If children are participating, prepare guidelines in advance or cut the strips for younger crafters.
A paper trimmer can make preparing large quantities much quicker.
Step 2: Create the Pumpkin Framework
Layer the strips to form a starburst.
Imagine looking down at the spokes of a wheel.
The centre of every strip should overlap in approximately the same place.
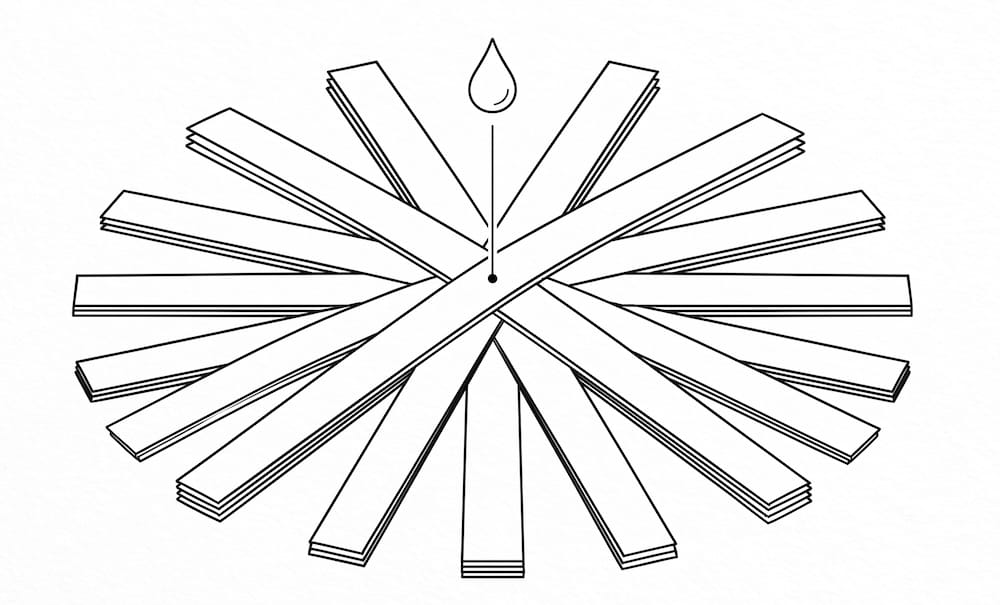
Glue or tape them together at that central point.
Allow the adhesive to hold before moving to the next stage.
Step 3: Build the 3D Shape
Take the two ends of your first strip and gently bend them upwards until they meet above the center.
Secure them together.
Repeat with the next strip.
Continue around the pumpkin until every strip meets at the top.
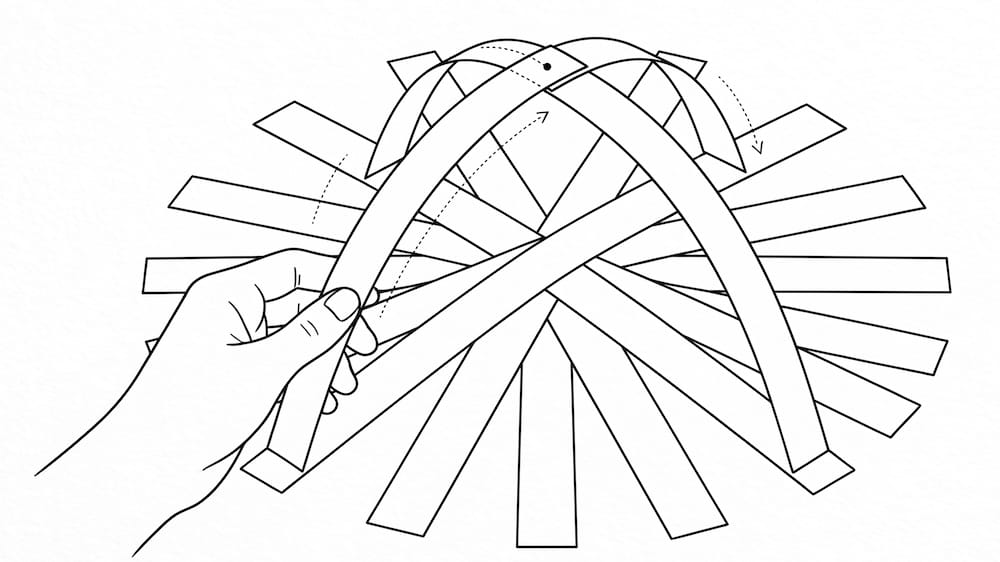
You’ll see the flat paper star gradually become a rounded 3D pumpkin.
Don’t crease the strips sharply. A gentle curve creates a much more natural shape.
If the pumpkin looks too tall, gently press down from the top. If you’d prefer something taller and narrower, use longer strips.
Step 4: Make the Stem
Cut a strip of green or brown paper and roll it tightly around a pencil.
Slide the pencil out and allow the paper to loosen slightly.
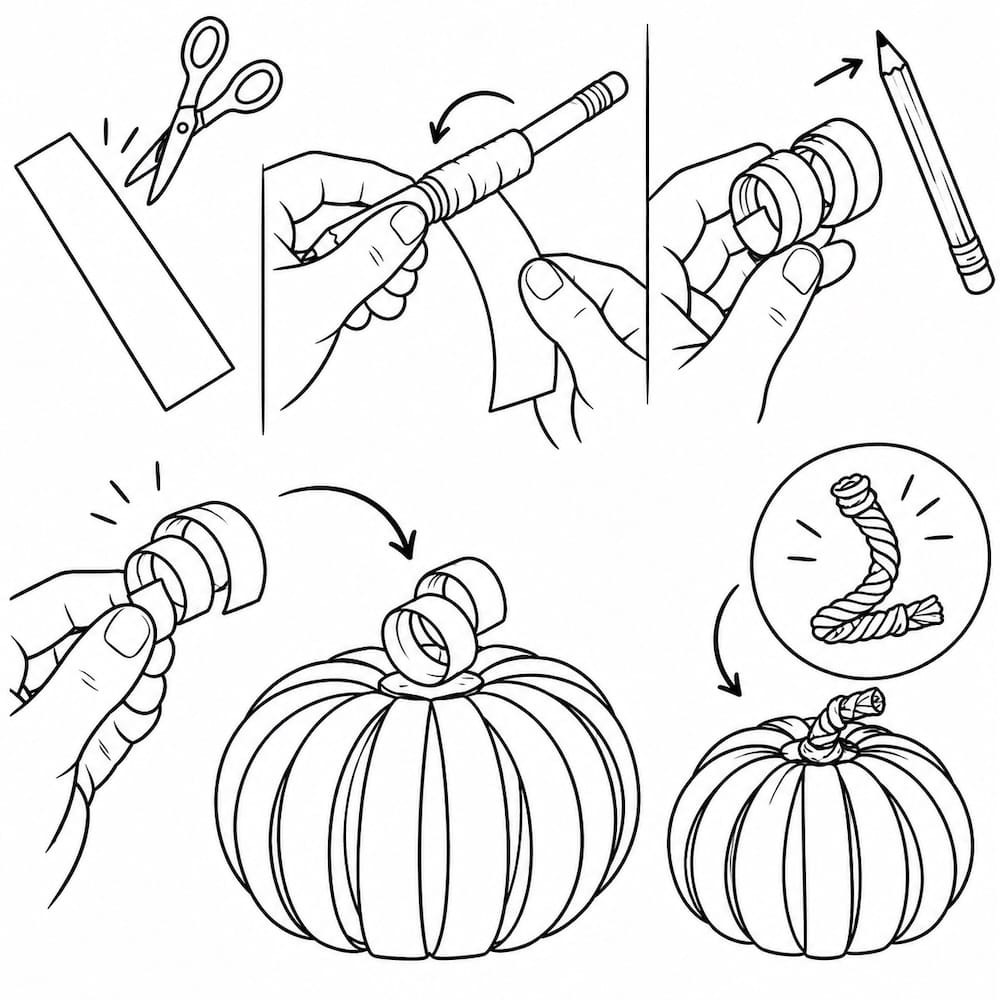
You now have a curled pumpkin stem.
Attach it to the top of your pumpkin.
For a more rustic version, use a short piece of brown paper cord or natural twine.
Step 5: Add Leaves and Tendrils
Cut one or two leaf shapes from green paper.
Fold a light crease through the centre of each leaf to add dimension.
For curling tendrils, cut very narrow strips of green paper and wrap them around a pencil. When you release them, they’ll retain their spiral shape.
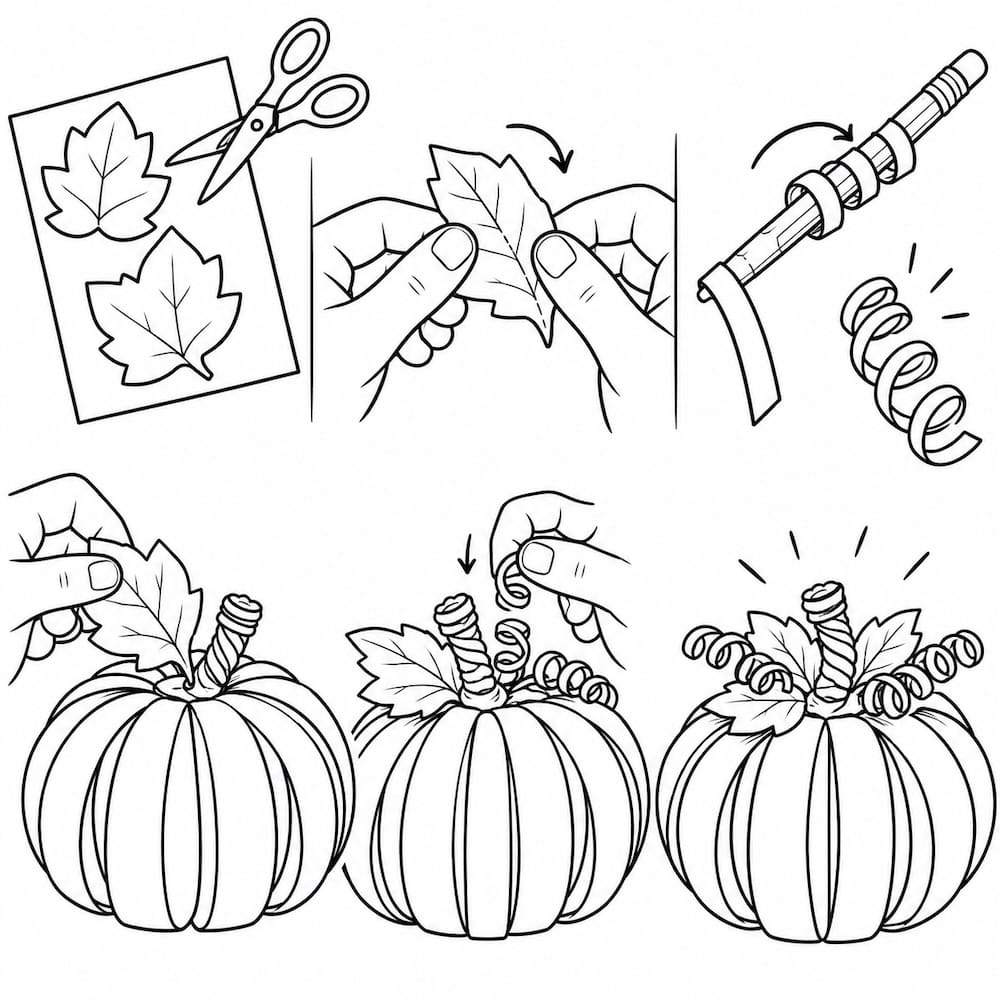
Glue everything around the stem.
Your basic paper pumpkin is finished.
Turn It into a Jack-o’-Lantern
Cut eyes, a nose and a mouth from black paper and glue them onto the strips.
Because there are gaps between the strips, keep the facial features relatively small.
Alternatively, use a black marker to add expressions.
Create several different faces, and suddenly you have an entire pumpkin family.
Make Miniature Place-Setting Pumpkins
Reduce the strip measurements and create tiny pumpkins for the dinner table.
Add a small card with each guest’s name.
These work particularly well for a Halloween dinner or autumn gathering because they function as both decorations and place cards.
Guests can take their pumpkins home afterwards.
Try a Rustic Autumn Pumpkin
Halloween doesn’t have to mean bright orange.
Use craft paper, pages from damaged old books destined for recycling, muted patterned paper or brown cardstock.
Add natural twine and artificial autumn leaves.
The result works throughout autumn rather than only at Halloween.
Make Glamorous Pumpkins
For a more sophisticated Halloween display, try combinations such as black and gold, white and silver or deep purple and copper.
Metallic cardstock can produce particularly striking results under warm lighting.
A collection of pumpkins in different sizes looks more intentional than several identical ones.
Create a Pumpkin Garland
Make a series of miniature flat or lightweight 3D pumpkins.
Thread them onto string with paper leaves between them.
Hang your pumpkin garland across a fireplace, window, shelf or party table.
Alternate pumpkins with bats or ghosts if you want something more overtly Halloween-themed.
Turn It into a Children’s Craft Session
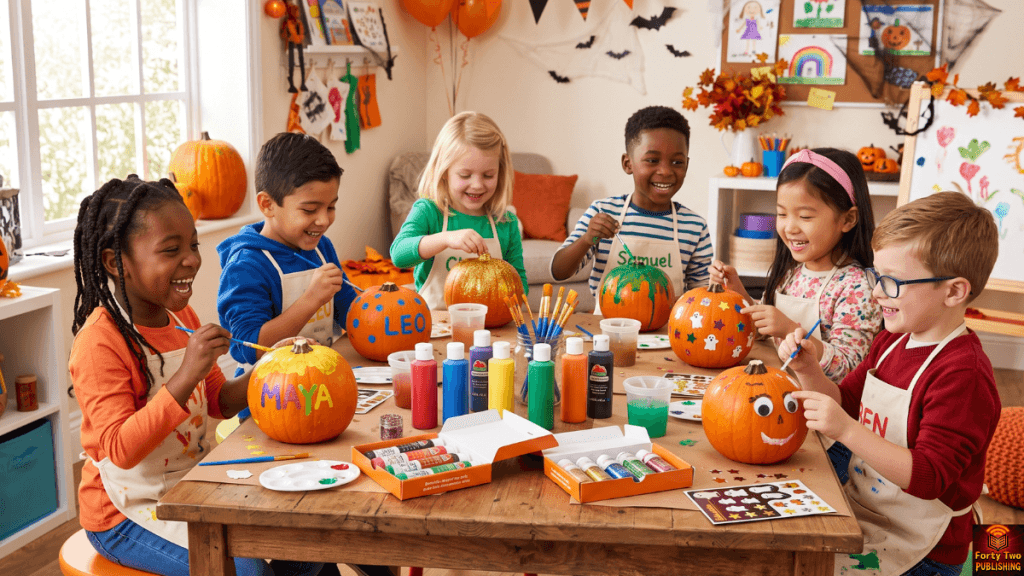
Paper pumpkins work particularly well with groups because they require no paint drying time and create relatively little mess.
Pre-cut strips for younger children and let them concentrate on assembling and decorating.
Provide stickers, pens and paper shapes for creating faces.
You can even get a child-friendly Halloween craft kit while older children can measure and cut everything themselves.
If you’re working with a classroom or large party, make one sample pumpkin first. Children understand the process faster when they can see the finished object.
Build a Complete Paper Pumpkin Patch
This is where the activity becomes particularly fun.
Instead of making one pumpkin, create a whole patch.
Make them tall, round, tiny, enormous, orange, patterned and black.
Give some faces and leave others plain.
Arrange them along a shelf with paper leaves and battery-operated lights weaving between them.
You can even make a cardboard sign saying:
PUMPKIN PATCH — BEWARE OF GHOSTS
Suddenly, a very inexpensive paper craft becomes a substantial Halloween display.
Store Them for Next Year
One advantage of paper decorations is that they can potentially be reused.
If you’ve used flexible adhesive instead of permanent glue, you can carefully flatten some designs for storage.
Otherwise, place finished pumpkins inside a sturdy box where they won’t be crushed.
Keep them somewhere dry.
After Halloween, remove any overtly spooky faces, and many paper pumpkins can remain on display throughout autumn.
Simple Materials, Surprisingly Good Results
Paper pumpkins demonstrate something that’s easy to forget when Halloween shops fill with increasingly elaborate decorations: seasonal crafting doesn’t need to be complicated.
A few sheets of paper, some glue and half an hour can produce something worth displaying.
Make one as an afternoon craft, create dozens for a party, turn them into place settings or build an entire miniature pumpkin patch.
And unlike the real pumpkin sitting outside your front door, these ones have the considerable advantage of still looking exactly the same several weeks later.
Missed a Newsletter? Check out the Newsletter Archive